The most important things though, were the dresses I did for my daughter's wedding.
The dress for my youngest daughter who was the bride's maid was the Sewaholic "Cambie" dress.
I made it in a aqua colored lace underlined in gray satin (my daughter's colors).
The dress went together really smoothly - it's a nice pattern. Fitting was pretty easy, the only 'issue' being that my daughter is significantly smaller (bust wise) on one side then the other. This is only noticeable on a fitted 'sleeveless' top like on this pattern, but a little tweaking with the fit and we had it fitting perfectly.


But I knew I didn't want to do something that white. So I picked up this lovely blue floral chiffon and mixed it with a navy chiffon I had in my stash, and got to work.

I hadn't been able to find a pattern that matched this dress, so I ended up taking what I knew about sewing and piecing it together with bits and pieces of patterns/sloapers.
The first step was to build the 'body' of the dress. I thought I would try making my own corset to keep all my lumpy bits online and give that awesome sweetheart neckline you can see in the original.
After not one:

Not two:

bit three tries:

I gave up on trying to make this work (I was running out of time!), chopped up the last foundation 'muslin' and used it as the base and just lined the chiffon and lost the 'sweetheart' underbodice (and wore my own bra)
Then I spent some time making a few muslins of the crossover top. That turned out to be pretty easy. Just a standard sloaper but in half lengthwise - rotate the bust dart to the empire waistline and widen the shoulders just a little, and draft a neckline that I liked. I made one of these in fashion fabric and one in navy blue chiffon for a lining. The skirt was just a standard 'dirndl' skirt. Four panels of fabric sewn together and gathered like crazy (twice - once in fashion fabric and once in the navy blue chiffon for a lining.! The 'belt was a piece (two pieces really) of fabric long enough to exactly fit around the foundation, but 2.5 times taller then I needed to fit the distance between my waist under the bust.
I then attached the skirt at the waistline of the foundation garment and checked the fit and hang. Next tried on the bodice and determined where I wanted it to attach to the foundation garment and where I wanted it to gather under the bust and where it was going to crossover - on my body. I transferred everything to my manikin and hand stitched/basted it into place - tried it on again, adjusted, and repeated until I was happy.
I then sewed the two pieces of my 'belt together along one long edge. the opposite 'raw' edge I sewed down at the waistline over the top of the skirt's raw edge so that when I pulled the belt 'up' to meet the bodice it would cover all these 'raw edges. Then I did the final stitch to attache the belt and bodice by machine under the bustline.
A zipper (that took me about two hours to install with all the layers of chiffon etc and some hand sewing to stitch down the pleats in the belt (and hemming) and I was done!
This was my result.
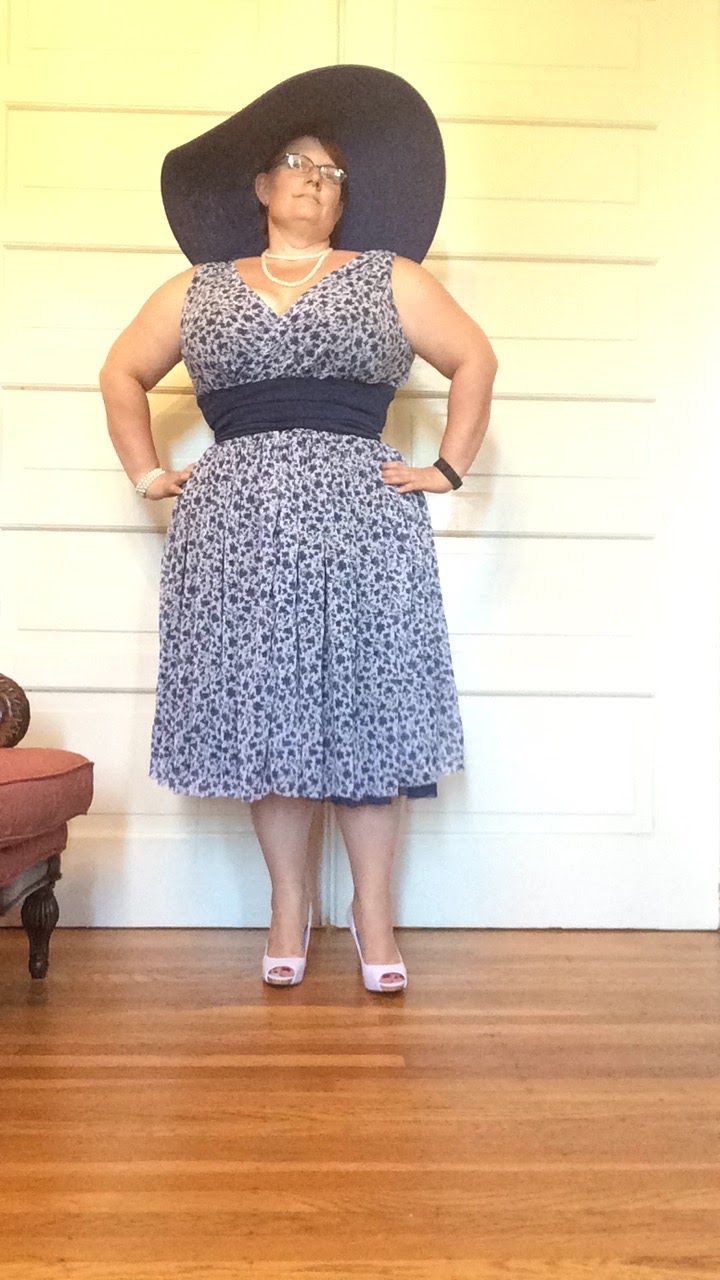
For the wedding I put a fluffy petticoat under and I think the overall effect was exactly what I was looking for!

And, it was a beautiful day too!
So, that's what I've been working on here lately..
Oh, and I'll show off my 'other' project for July -- my 4th of july dress which I'm equally as happy about. Butterick 6049

